
Hardware Required:
1. RFID MFRC-522
2. RFID Tag
3. Arduino UNO
First, go to the following Github page and download the RFID Library master.zip file.
https://github.com/miguelbalboa/rfid
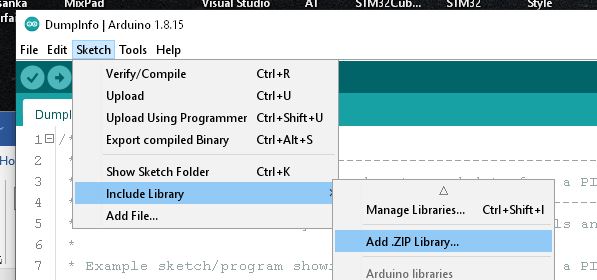
Install the zip file on Arduino IDE.
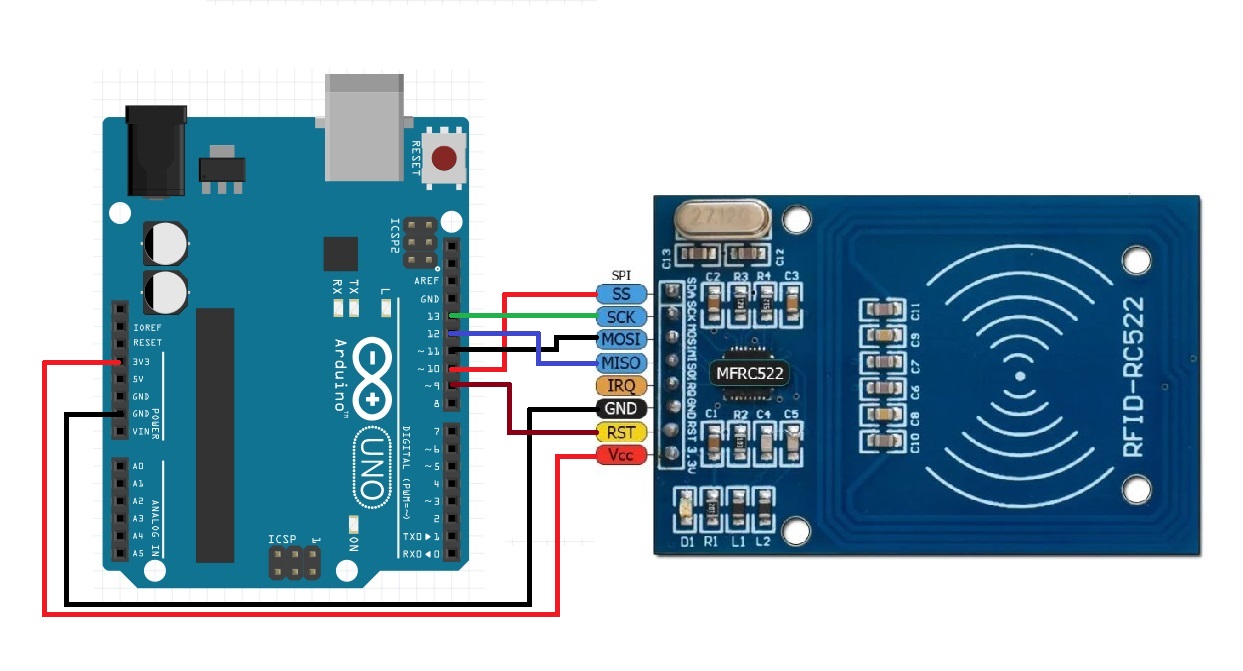
Once installed, connect the RFID MFRC-522 to Arduino UNO as follows:
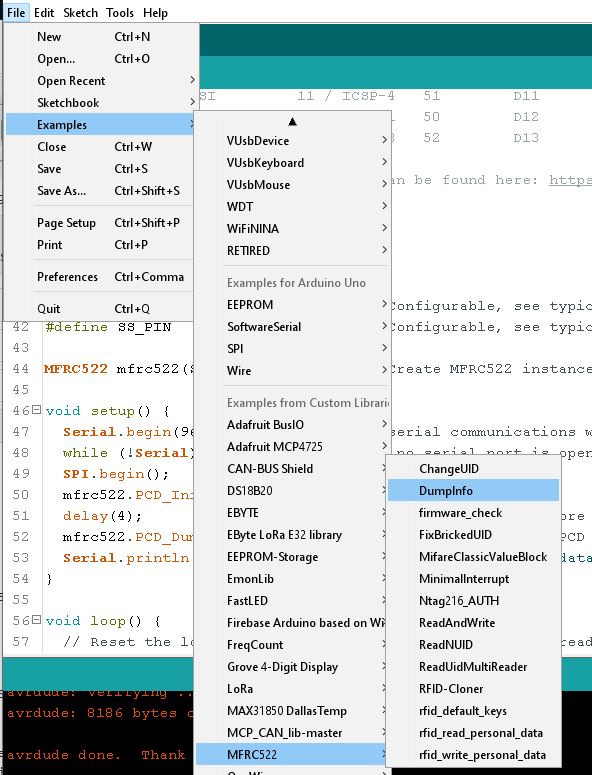
From Arduino IDE, load the example Dumpinfo.ino.
Open the serial monitor.
Now RFID Reader board is ready to read RFID cards.
Swipe the card or Key tag.
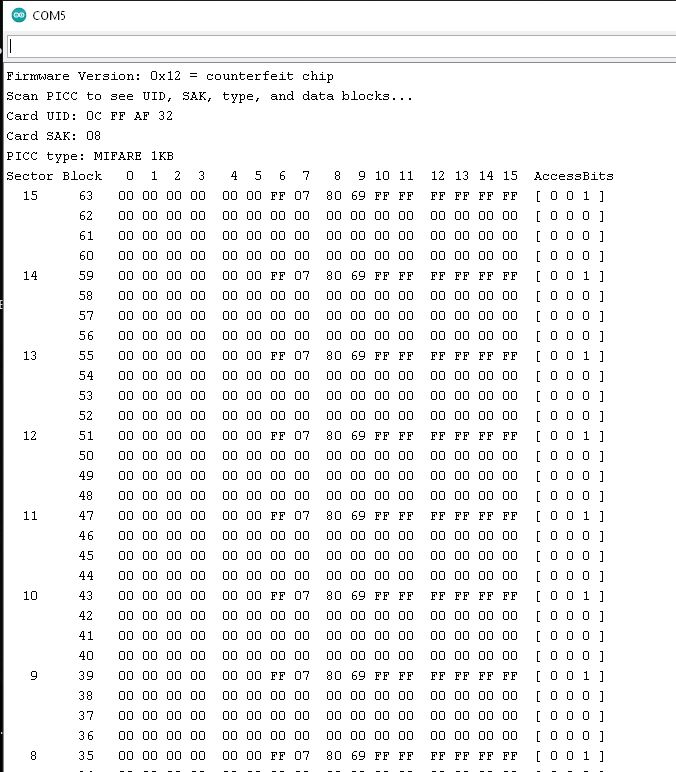
You will get something like this:
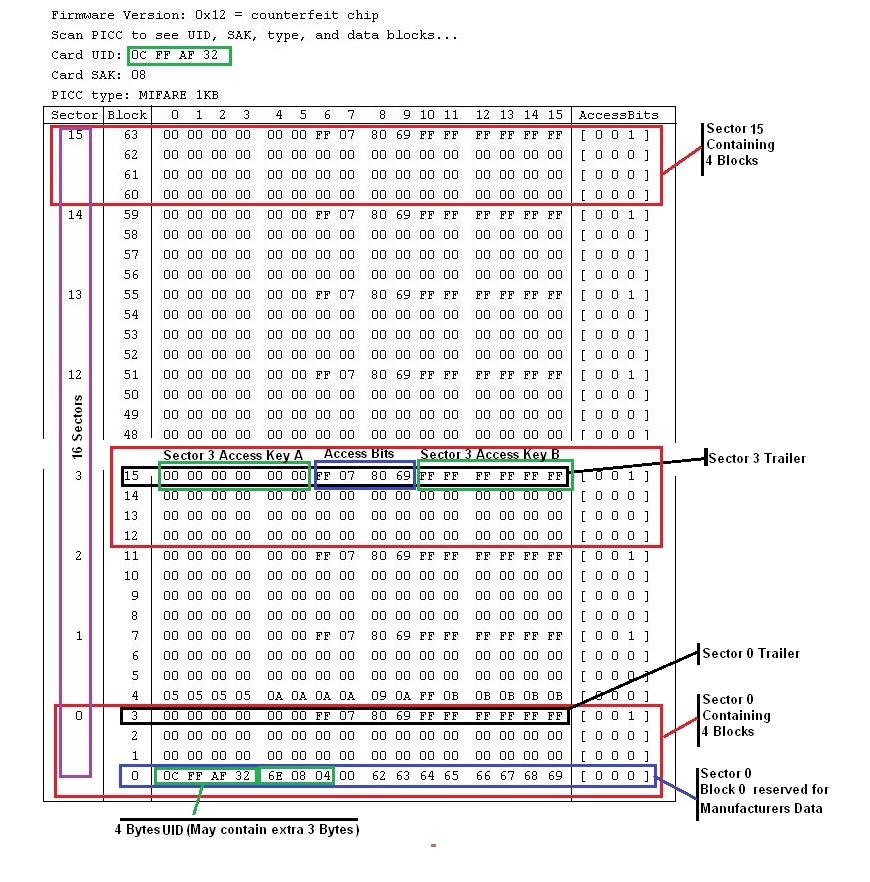
From this you can find out the UID of the Tag or Card.
MIFARE 1K Data Structure:
Now connect an LED on Digital Pin-8 and load the following code to UNO:
Note: This example allows only 2 x cards. If you need few more, add UIDs as necessary.
/*
 * Simple Access Control System
 * All the resources for this project: https://randomnerdtutorials.com/
 * Modified by AMP Tech
 */

#include <SPI.h>
#include <MFRC522.h>

#define SS_PIN 10
#define RST_PIN 9
#define LED_PIN 8

MFRC522 mfrc522(SS_PIN, RST_PIN);   // Create MFRC522 instance.
String mystring = "";

void setup()
{
  Serial.begin(9600);   // Initiate a serial communication
  SPI.begin();      // Initiate  SPI bus
  mfrc522.PCD_Init();   // Initiate MFRC522
  Serial.println("Approximate your card to the reader...");
  Serial.println();
  pinMode(LED_PIN, OUTPUT);
}
void loop()
{
  // Look for new cards
  if ( ! mfrc522.PICC_IsNewCardPresent())
  {
    return;
  }
  // Select one of the cards
  if ( ! mfrc522.PICC_ReadCardSerial())
  {
    return;
  }
  //Show UID on serial monitor
  Serial.print("UID tag :");
  String content= "";
  byte letter;
  for (byte i = 0; i < mfrc522.uid.size; i++)
  {
     Serial.print(mfrc522.uid.uidByte[i] < 0x10 ? " 0" : " ");
     Serial.print(mfrc522.uid.uidByte[i], HEX);
     content.concat(String(mfrc522.uid.uidByte[i] < 0x10 ? " 0" : " "));
     content.concat(String(mfrc522.uid.uidByte[i], HEX));
  }
  Serial.println();
  Serial.print("Message : ");
  content.toUpperCase();
  mystring = content.substring(1);
  if ((mystring  == "CB 8E EB 3C") | (mystring  == "0C FF AF 32")) //replace with your card UIDs
  {
    Serial.println("Access Granted");
    Serial.println();
    digitalWrite(LED_PIN, HIGH);   // turn the LED on (HIGH is the voltage level)
    delay(1000);                       // wait for a second
    digitalWrite(LED_PIN, LOW);
    delay(2000);
  }

 else   {
    Serial.println(" Access Denied");
    Serial.println();
    delay(2000);
  }
}
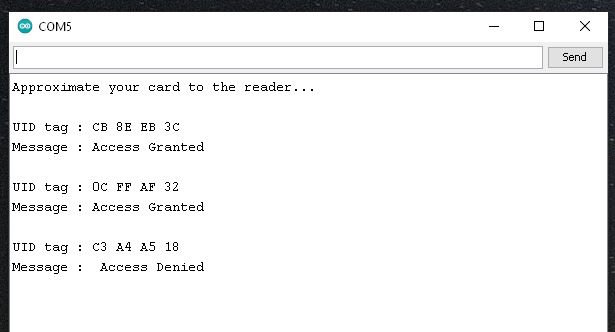
This simple Access control Grant access for only 2 x cards with
UID = “CB 8E EB 3C” or “0C FF AF 32”.
Others are Denied.
Also Led on D8 blinks when Access Granted.
A relay or other device can be connected to D8.
Serial Out:

Leave a comment