
Hardware Required:
1. Either Raspberry Pi Pico/Pico-W/RP2040 Zero
2. PC with Windows 10
3. WS2812B Neopixel Strip
Using MicroPython is the easiest way to program the Raspberry Pi Pico Series.
When you first get the Pico board, it is only got UF2 Bootloader loaded in it.
So it can load of flash UF2 files.
UF2 (USB Flashing Format) is a file format that designed by Microsoft for programming micro controller boards.
Once you plug it into your Windows PC, it looks like a flash drive with 127MB capacity.
Actually Pico boards got only 2MB of external flash.
You can drag and drop files, looks like it is there, but once re-plug it, all gone, like fake.
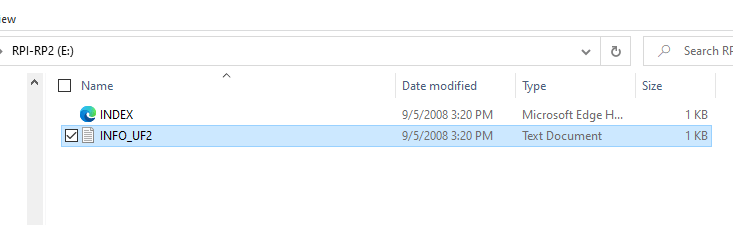
But if you drag and drop UF2 file into the flash drive, boot loader loads the UF2 file on to Pico.
Pico can’t run standard Python interpreter library because it has only 2MB flash.
So Micropython interpreter design to fit in to small amount of flash.
It may not support all the functions but more than enough for most of the things.
How to load the MicroPython:
There are two files, one for Pico and one for Pico W.
Download MicroPython uf2 file for RPI Pico/RP2040 Zero here.
Download MicroPython uf2 file for RPI Pico-W here.
First download one of the above files.
Connect the Pico to the PC, if you can see RPI-RP2 drive, drop the uf2 file in to it.
If you can’t see the flash drive, remove it, while keeping BOOT button pressed, plug to back board to PC.
You might see it. Drop the file into it. The boot loader recognize it and will flash it.
uf2 file will disappear.
Now the MicroPython Interpreter already installed and can start programming.
First we will use terminal emulator program like Putty.
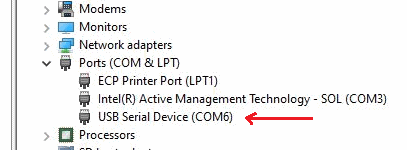
Open Putty and select the Connection Type as Serial and Select the correct com port.
Use the device manager on your PC to get the Comport number, in our case COM6 as seen below
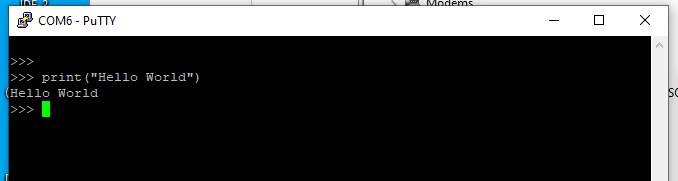
On the Python command prompt, type print(“Hello World”) and enter.
Pico Python will reply as expected. Enter again to get the Prompt.
This is called REPL Prompt (stands for Read Evaluate Print Loop).
Lets flash on-board LED:
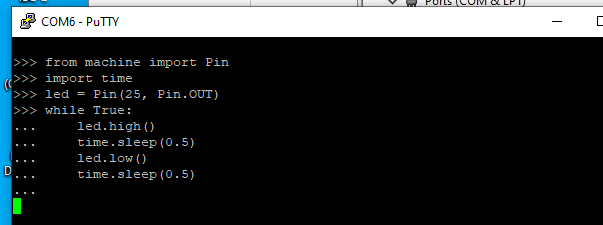
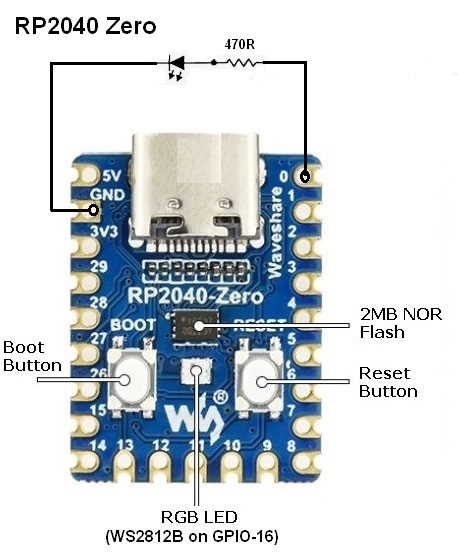
RPI Pico/Pico W, on-board LED is on Pin-25.
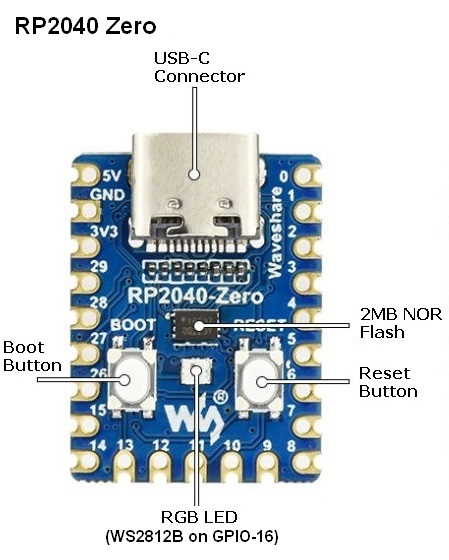
There is RGB Led on RP2040 Zero board (Data Line on GPIO-16)
Type the following few lines to flash the on-board LED:
(This is not valid for RP2040 Zero)
Using PuTTY is not that user friendly. So will use Thonny (A Python IDE) instead.
DownloadThonny here.
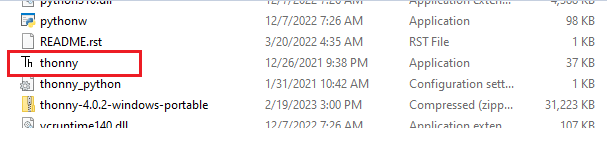
Download Windows Zip file, unzip into a folder and double click on thonny.exe to run it.
You can just run from the folder without installing it.
From Thonny IDE,
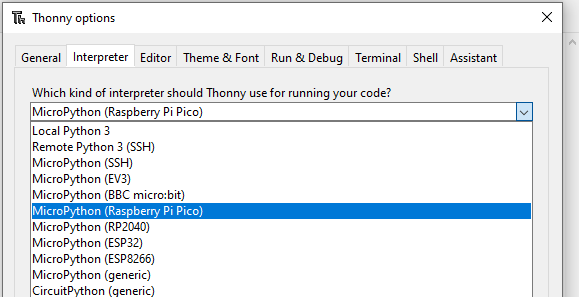
Tools -> Options , click on Interpreter tab.
Select option Interpreter as: Micro Python (Raspberry Pi Pico)
Select Port as: Try to detect port automatically
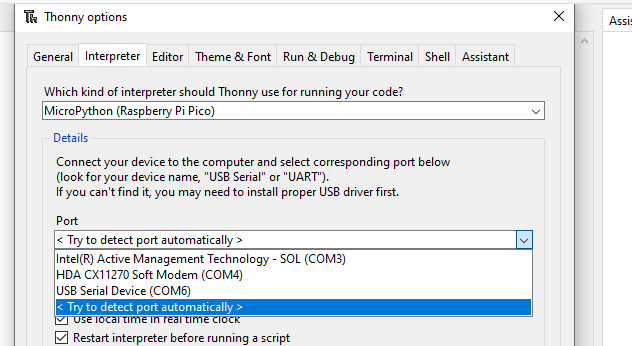
Click OK and save and close everything.Now you can use Thonny.
Connect the Pico board to the USB port of the PC and launch Thonny by double clicking on Thonny application as above.
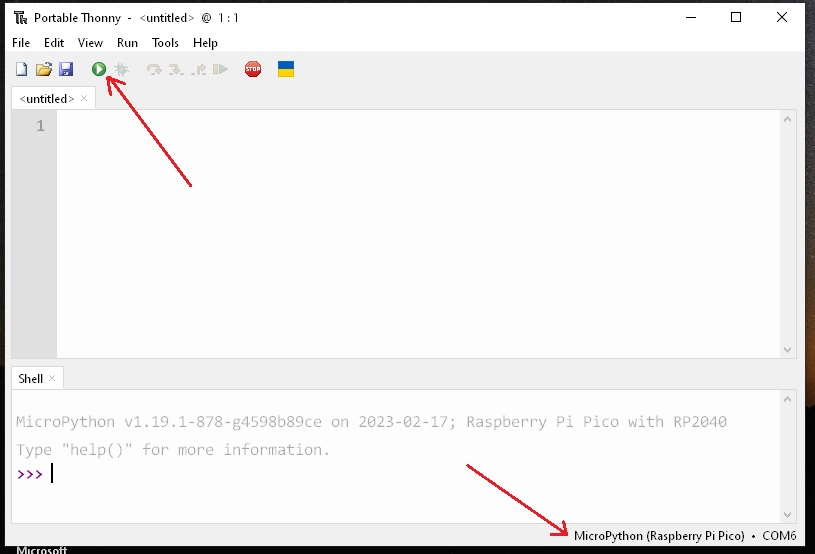
On the IDE Run button on top should be Green and the bottom should say it is connected on one of the com ports of the PC.
If it is not connected, check the device manager and see the com port listed.
If not re-plug or reset the board and relaunch Thonny. Try clicking Stop button on top bar.
Once connected, you can type the script below and click on Run button.
It should blink.
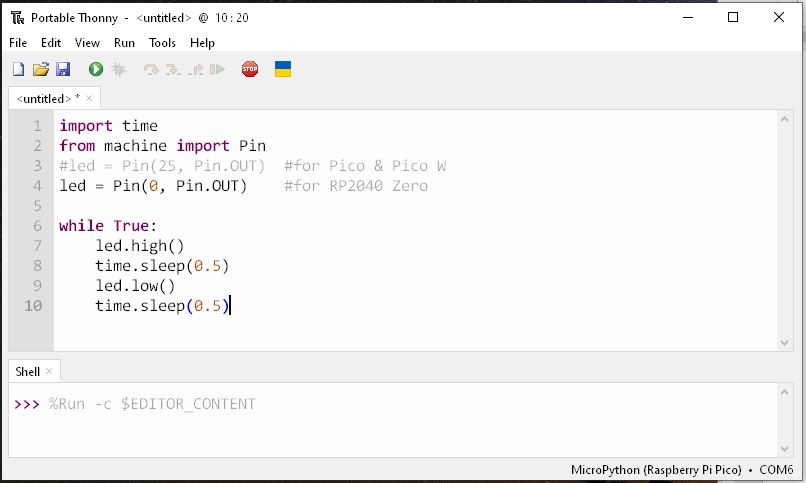
This example we used RP2040 Zero with an external LED +Current Limiting Resistor on GPIO-0.
because it does not have a normal LED on Pin-25. It has a WS2812B Neopixel on Pin-16.
Please note when typing Python script, Upper/Lower case and white spaces are very important.
Pin should be GPIO-25 for Pico and Pico W.
Now will try to save this file in Pico:
First Stop the script running by clicking Stop button on top.
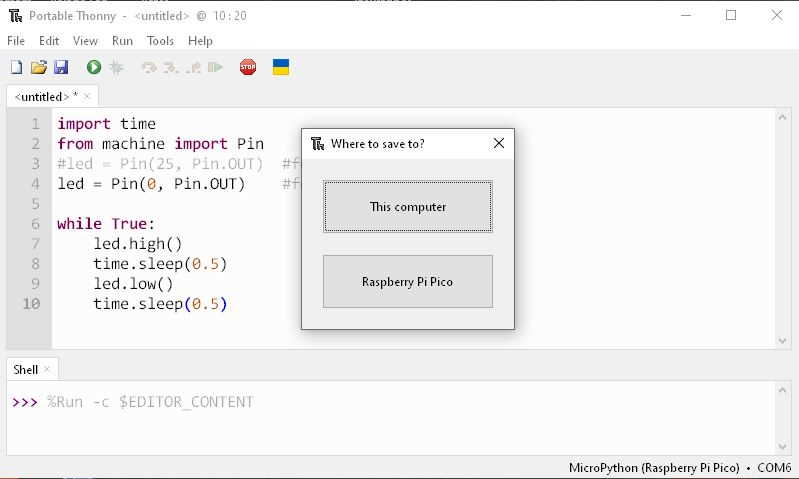
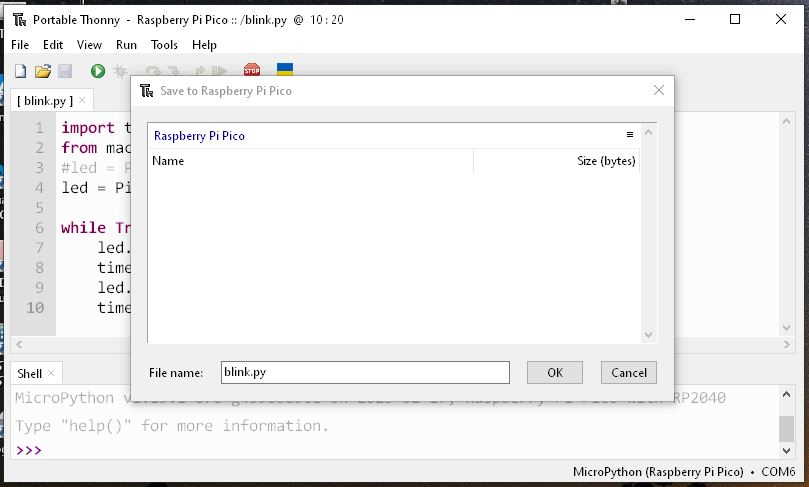
Now save the script as blink.py ,It will prompt where to save:
(If you did not stop, Pico might say device is busy)
Save in Raspberry Pi Pico.
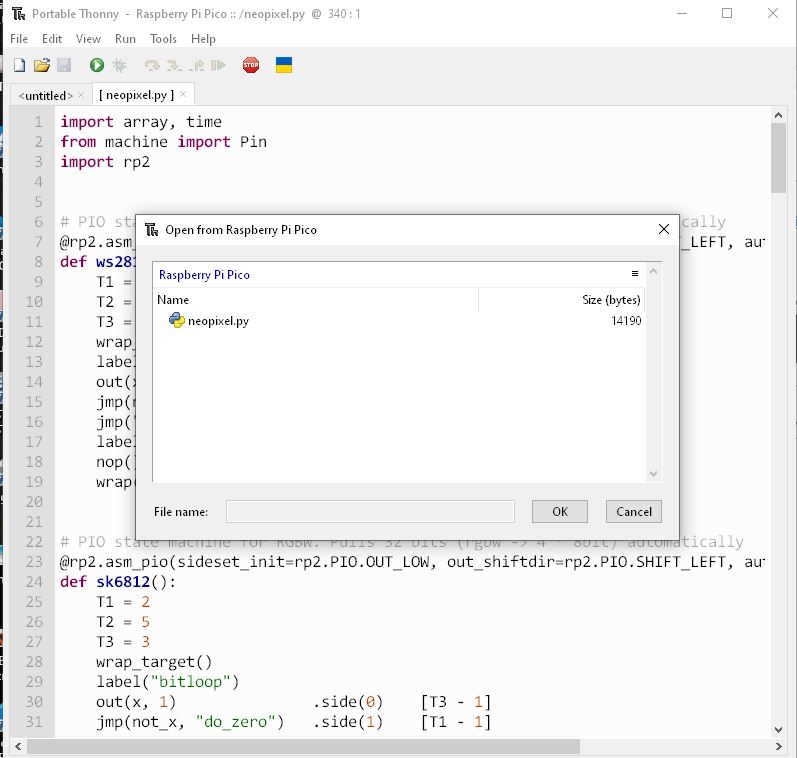
If you want to go back and check,
File -> Open then select open from Raspberry Pi Pico:
You will see the saved file. You can open it and edit it.
Pl Note that if you reset the board the script will stop running.
If you want to run the script when board is re-powered or reboot, then script needs to save as main.py.
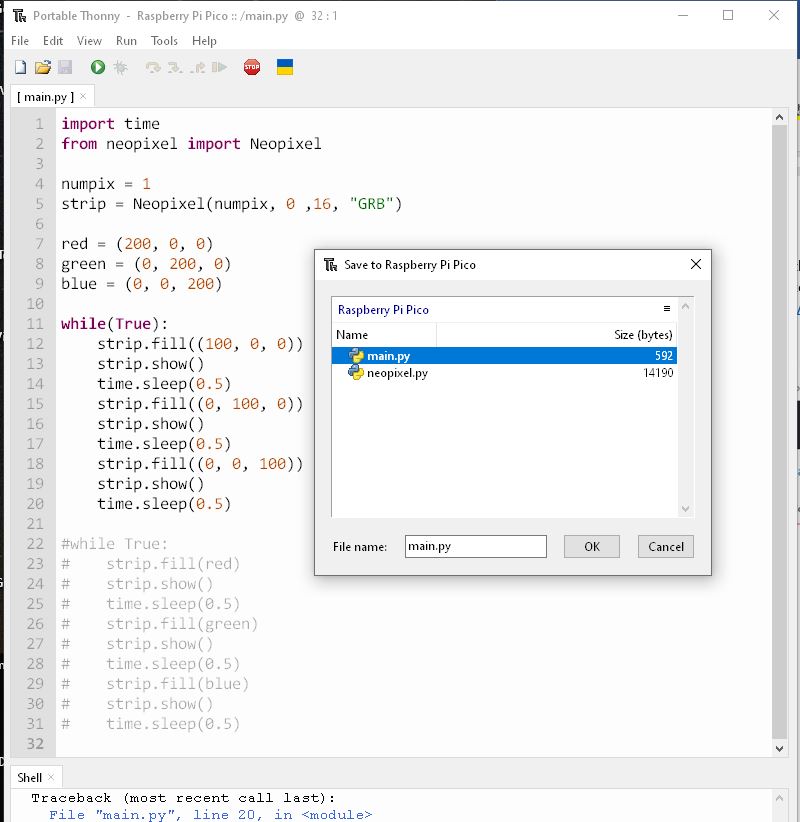
Blinking the on-board Neopixel WS2812 LED on RP2040 Zero Board:
Open a new document in Thonny, copy and past the MicrPython script called neopixel.py from this link
and save it as neopixel.py on the RP2040 Zero board.
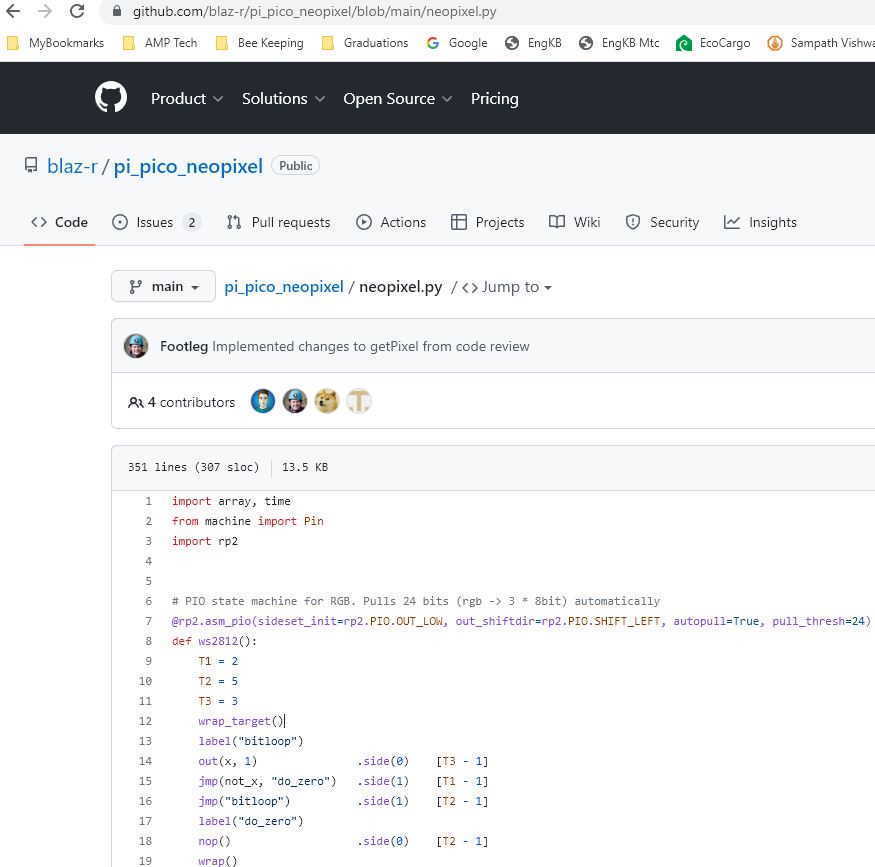
This is the Neopixel Library we are going to use.
Once you have saved neopixel.py on the RP2040 Zero, then you can use the neopixel library.
Now, open a new script in Thonny, enter the following script and save as main.py on the Pico and run it.
It should flash the on-board RGB led.
Brightness, color all can be controlled.
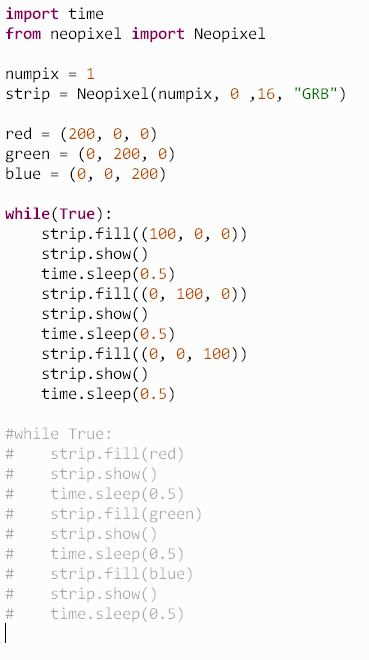
similar way, you can control external WS2812B Neopixel LED strip on a different GPIO pin.
For more information:
Raspberry Pi Pico Python SDK (MicroPython Environment for RP2040 Micros)
Reference:
https://picockpit.com/raspberry-pi/raspberry-pi-pico-and-micropython-on-windows/
https://github.com/blaz-r/pi_pico_neopixel/

Leave a comment